Friday, March 9, 2012

Part V: Building Barbietown- finished exterior on cafe...


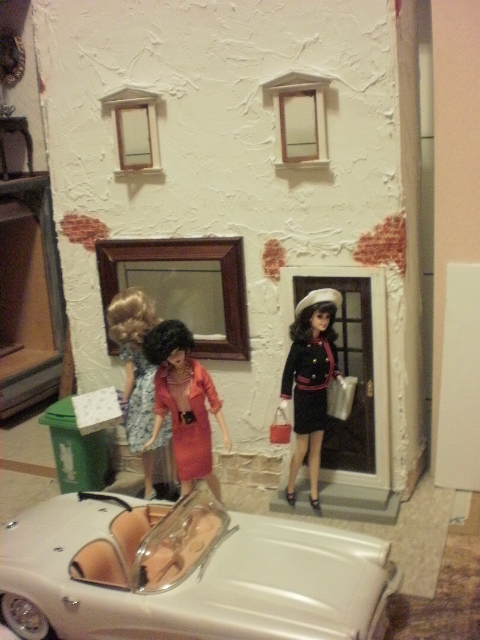
I have included ALOT of pics here to show the cafe exterior finished! The only thing I haven't done is the lettering on the window....steps are glued together and painted, exterior stucco on both sides are done, and the doors and windows stained and painted, doorknob is added to the door too. It really looks so good. I might take a little time to do touchup on the stone foundation, and maybe add some moss to it....I am in the process of ordering more playscale doors, and cobblestone sheeting for the 'road' in front of the street of shops.
Enjoy the pics! More to come!
~Lisa

Wednesday, March 7, 2012

Part lV: Building Barbietown: The boutique window storefront

Here's my progress thus far on building this faux storefront:


As you can see, the faux storefront/boutique window is a sheet of foamcore, with foamcore 'window' frame, and a faux door at the moment, recessed a bit from the cafe. My brick wall is used to hide my bookshelf with rement stored on it and create the illusion of a small street front. I used a tutorial by Audrey of Diva Details on Doll Divas Message Board . Click HERE
for the Tutorial on How To Create  A Boutique Window by Audrey. I customized the window tutorial to suit my needs, using foamcore scraps.
The Mannequin is one of those design mannequin sets that I got at Toys R Us on sale, I have another one and this window was customized to fit both if I wished to have window overload. It is a pitiful display right now, but I wished mainly to see how it looks with placement, and dolls looking in the window. My intention on the door was to use a french door from Houseworks, but I am stumped there as funds are low, creativity high. lol...Enjoy the pics!~Lisa

Tuesday, March 6, 2012

The Maid....


Sorry for the grainy photos, these above were taken yesterday. One night I was trolling on Ebay and found this cute little 'maid' uniform. I had been looking for a maid uniform because Agnes needs a full staff for the dollhouse. It is labeled for the Cy girls but fits the FR ladies quite great. Lucia became the maid, and she looks quite good. The shoes were from Cruise Control Vanessa's outfit, I needed a pair of black pumps but the shoes this outfit came with are from those styling mannequins and didn't fit. As you can see, Lucia has already caught the wandering eye of Pierre de Vries.....


Though I dislike using the flash, these pics turned out really well compared to the yellow tinge without it. It shows the vivid colors of the dress Agnes is holding as well as Lucia's uniform. Here they are going thru Agnes' new arrivals from the shop she just visited because she has 'nothing to wear.'' lol....Hopefully I can play with the camera more and get better photos, I think it is the white andd the pink that throw that yellow tinge on the pictures.
The progress on the town has stopped temporarily until I get more supplies, I am at something of a standstill. I have figured out the dimensions for the boutique shop window, but really need to order more playscale doors as well as cobblestone tile for the street. The storyline of the dollhouse is also developing very quickly--I am now looking for uniforms for a butler, and a chef. Since Agnes is supposed to be a Baroness, I was even thinking of those 18th century uniforms worn by the Queen's staff you see in photos of Windsor and Buckingham palace, with the bewigged footmen about- that would be extremely neat in the dining room. I'll probably look at action figures if I go that far-lol.
Enjoy- more to come soon!
~Lisa

Saturday, March 3, 2012

Part lll: Barbietown building progress...


Here is the continuing progress of my project..or obsession...lol...This morning as soon as I got up I checked the paperclay which was dry and immediatelybegan to add the color washes. I have been soooooooo focused on this project I keep dreaming about what it will look like...and then I go build! It has been a while since I have had the time to do this, and sometimes I have had to make time in the early hours of the morning, sculpting, painting, etc. Above pics you can see how I added the colorwashes to the stone foundation and exposed brick- I still have more color to add to the foundation. For fun I posed some dolls, my doll's Jag, and the brick wall backdrop I created last summer for my custom skateboarder, who is also in the picture and adds a bit of busy life to a shopping scene.


Here is how I started this morning with the first series of 'dirty' washes with acrylics to add color. first I started with brown paint, thinned with water, then a thinned out 'dirty' wash of black, these colors add the dirt and grime and age underneath your main color palette. I drybrushed on the reds to the exposed brick. The stone foundation will need more color, but with joint compound it is best to let it dry for a day fully before adding more color. I intend to finish this building as fully as I can before going onto the next shop set that will be next door- for now to give an idea, the above photos with the brick wall backdrop beside it will give a great illusion of what I jokingly refer to as 'Barbietown'....
~Lisa

Friday, March 2, 2012

Building Barbietown- part ll progress


A few progress photos of the detailing on the cafe exterior. The detailing and exteriors take a while to dry. I have used paperclay to create the exposed brick- joint compound is sculpted into the foundation stonework(shown above) and will also be used as the stucco. My intention is for it to look like an elite, historic little shopping distric, much like the Grove Avenue or Carytown areas herein Richmond Virginia or in Williamsburg or Fredericksburg. I think when I 'm done it will most resemble downtown historic Fredericksburg. 
This project has really come together so quickly--- I honestly think of nothing else when I have alot of major things going on right now- especially with the charitable organizations I work with. I think it is my creative release so to speak. While sculpting I am already planning the next shop front, which will be an actual shop window display with a faux door that I can change out the displays with the seasons...My dolls love to shop!LOL....I haven't really focused too much on the interior of this but will after the exterior work is done. Due to the placement on the town street, it will be difficult unless this shop front is turned around for interior shot photos..
I will post more as I progress, hopefully will get more sculpting done this evening after the stonework sets up!
~Enjoy the progress of Barbietown!
~Lisa

Thursday, March 1, 2012

The Beginning of Building A 'Barbietown'....

I've been absent a bit, but one reason is because I've been busy getting any dolly building I have out of the way- this evening and Friday, and Saturday of the beginning of the month are always hectic for me with my charity work I do at the beginning of the month. I have started YET another building project- otherwise known as 'Building Barbietown' for want of a better description!  My intention was to build a street of two shops or a park, and have long been inspired by Em'lia Couture's flicker set of building her staircase, shop and park near her dollhouse. My dollhouse too has not front setting, is just open, and this greatly appealed to me. Though I do not think I can create as much as she does, I am hoping to make a nice little street scene.....Here are the pictures of my progress so far yesterday on what will be a cafe or bakery...

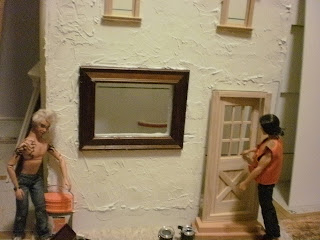

As you can tell, the 1:6 scale construction crew has moved in with their tools, paintbuckets and general mini mayhem. The structure is made of two thicknesses of foamcore- the sides are thin foamcore the front is 1/2 inch thick. Cafe window is a $2 5 x7 picture frame from Dollar General and the door is a Houseworks Playscale crossbuck door, and windows are dollhouse components. Steps are wood, which have not yet been finished. I used two contractor floor tiles for .69 cents each to create the walkway and floor inside the cafe/bakery....Here it is shown with the front 'mudded' with joint compound to give it a stucco finish....I basically did all of this in one day and it was mostly testing to see if the foamcore will hold up. I like working with the 1./2 inch foamcore because it is stronger and can take more texture building.


These are the progress photos after the 'bones' of the structure were built. I used my tallest FR Homme for scale comparison, I love the houseworks crossbuck door, but it needs added height to give the illusion it will fit the FR and Silkstone dolls, and not just shorty Barbie. I used the steps to do this.
Right now, it is still a work in progress, as the front and side will look aged, with crumbling plaster, exposed brick, like the dollhouse, in a small provincial town.

This is an overall view of the room with the dioramas and the one sixth scale dollhouse to the left. The street of shops will be a 'set' designed to hide the drawer handles on the chest of drawers that the McDonald's sits on....and possibly come out further with bistro tables, sidewalk, maybe an alley in between the next shop set- see the foamcore to the right?lol. I have an idea to have an alley right there, which will look really cool. The sets hide the drawers on the chest of drawers...trees, freen felt for grass will be added. I hope you enjoy watching me build 'barbietown'....LOL...
~Lisa