Thursday, June 16, 2011

Sindy fridge arrived! More on Sindy kitchen diorama...

Yippee! My Sindy fridge won on Ebay arrived yesterday ! I couldn't believe how great it was, and at such a great price.  Sindy items are generally hard to find in the US, but they were more intricately detailed than Mattel, which was the cardboard king. Sindy items are generally from the United Kingdom.


The fridge came with ice cube tray w/ removeable ice cubes! plastic shelves for each side, not all were there, but there were enough to make it look believeable. 3 boxes of green beans, Pepsi, water pitcher, ham, chocolate milk, and pizza box with pizza completed the set. I am really really pleased with this item. If you cannot get a Kenmore kitchen, Sindy is the next best thing- and there were alot of color variations out there, including the dreaded pink.
The diorama roombox scene for this kitchen is not as permanent as my Skipper bedroom I posted about yesterday. I will probably make this into a good roombox for the shelf as well, since the Skipper bedroom went together so quickly. I originally purchased this set for the one sixth scale dollhouse- but may collect more Sindy kitchen items for that dollhouse room itself.
When the roombox is finished, I will put the rest of the wallpapers up, and then the fun will begin. This room needs a nice window and a good door as well, to make it look as true to life as I would like.
All for now- enjoy the photos!
~Lisa

Wednesday, June 15, 2011

Skipper bedroom diorama progress..

Today I hit the sale at Michael's while out running errands. I have still been working on the Sindy kitchen scene, but wanted a special roombox for the vintage bunkbeds I had for Skipper. I was lucky enough to find more of the scrapbook paper that matched what I used for the Sindy kitchen, plus they had a sale on foamcore 2 for $3!! Four sheets and I was ready to build my bedroom.
Dimensions for this room matched the cheapo plastic shelves from BJ's I purchased a few years ago for about $20 apiece- I have three. I think the reason for the cheapo price back then is they were in the kids' crayola colors- blue red and yellow, and are made of plastic. Not Ikea, but they do to hold the dolls and room box scenes, and miniature items, plus my boxed dolls as well. The SKipper bedroom and teh Sindy kitchen will reside on these shelves. I'm cleaning out my display space of items I don't use anymore, so please watch my Ebay Auctions . I currently have three lots of American Miniaturist & Miniature Collector magazines with 14 magazines in each lot starting at a low bid of $1.99, plus a set of repainted barbie salon furniture for 3.99. And of course, damaged large scales of Bespaq- but keep watching because I will be listing more magazines and barbies and props as well from my own personal collection. Bids will be started very low as I need to move these items.
Back to the bedroom scene- Dimensions on the room are 28 inches wide, 15 inches deep and 15 inches high. Small, but I think this will pack some punch. One reason I wish to make room scenes on the shelves is to hold all of my extra props and furniture and dolls- I am so tired of my dolls having no place to stand or be displayed comfortably. I will also be working on a room scene for the Jonathan Adler sofa that will be very modern.

Finished room scene box for shelf display


Materials used- Loctite caulk adhesive- available at Home Depot or Lowe's, wood grained shelf paper- also available at Family dollar stores or Lowe's, scissors, xacto knife, rulers, & 3 sheets of foamcore, one 1:12 scale dollhouse miniature window component.

Measure the space where you wish your roombox to be placed, and shave an inch off. I have not placed a ceiling on my roombox as of yet, to make it easier to put the wallpaper on the walls. I use YES! scrapbook paper glue for this- it is available in Michael's or other hobby stores. I put my floor shelf paper on the floor before glueing the walls and floor together.
Cut your foamcore. Remember, measure twice, cut once. It helps to write down your dimensions of the shelf you are creating for. Put a line of loctite caulk adhesive on the bottom edges of the back wall and floor, glue together. Let it sit for a few minutes as it grabs quickly. Next, cut your side wall panels, and do the same as you did for the floor. After these pieces are glued, it helps for steadying and dry time to put a couple of pieces of masking tape on the outside walls to holdit while the loctite dries.
Hopefully, next step will be the paper for the walls!


An update on dolly arrivals- Mini American Girl Kit has arrived! Mini Emily is excited and anxious for me to start back to work on Kit's bedroom in the dollhouse. Mini Kit comes to the doll family from one of my friends at American Girl Playthings forum where I hang out. Cheryl, also known as Memory on the board, collects Little Mo's and Hitty dolls as well as the mini american girl dolls. This Kit is special because she repainted her eyes. I look forward to seeing what adventures these two will get into, especially since Mini Rebecca who was won from Ebay will be arriving shortly as well!
All in all, had a great day and hope to get some more work done on both the kitchen and bedroom scenes this week!
~Lisa

Sunday, June 12, 2011

Vintage Skipper bed project...


Today I had some time to myself and decided to work some more on my diorama projects I had started. Months ago, I won this wonderful vintage Skipper bunk bed for a whopping $16 including shipping on Ebay. It did not have some of its original bedding, just the frame. I had long wanted to put it into the One Sixth Scale dollhouse, but it would not fit. So I am going in my travels to look for more foamcore to make a Skipper scene, as I simply love this bed.
Unlike some Barbie collectors, I have always loved Francie, Stacey, Tutti, Skipper, Scooter, Todd, & Kelly far more than Barbie herself. I think as a child PJ (not really known to exist anymore) was more appealing to me because of her ponytails and hair ornaments. My Malibu PJ lies in my Barbie case as testament to this, since she was actually one of my favorites.
Today I made mattresses and pillows with pillow cases for the beds. It was actually quick, easy and fun, just the sort of project I like. I have a vintage Skipper, but couldn't locate her in time for this photo. So Growing Up Skipper, Tutti, Kelly and Mini American Girl Emily are all in the pic. I've always thought Skipper's bedroom would be more fun to do, with pre adolescent toys, bunk beds, pillow fights, sleep overs that remind me of my own teenage years. Especially with that Brady Bunch color scheme, moddish yellows and pinks, it will look really great. For now, I used the kitchen set up on the shelf to take the pics of the bedding. I will probably make a trip to Joann's for some mod fabrics to go with the bedding. Also, some posters of Donny Osmond, Shawn Cassidy, and so on and Skipper's bedroom should be cool looking.
UPDATE ON the Vintage Sindy Kitchen project: This project is coming along. I won a vintage Sindy side by side fridge and it's being shipped- what a great price for a vintage piece- $15!!Her cabinets are harder to get ahold of, but am working on it.
UPDATE ON THE Tinies' dollhouse restoration-This is coming along as well. The attic rooms will be made to look like Kit's bedroom in the historical series- Mini Kit is coming to live here, as well as Mini Rebecca! So soon the dollhouse will be overrun with Mini AG's...and I need to start sewing. lol . Today am cutting the stripwood to make the rafters/timbers in Kit's bedroom. I'm working from one of the older Pleasant company American Girl catalogs and it is really coming along.Hopefully will be able to find a mniature bed similar to Kits that can be painted green and go into that room.


Enjoy the pictures! Here Tutti is having fun climbing on the ladder and mini Emily is enjoying the top bunk!
~Lisa

Thursday, June 9, 2011

More 1:6 scale fun with vintage Sindy furniture....

After the loads of pics of Mini Emily and my tiny bjd's with the whole dollhouse restoration project going on, I have been working on making enough room in the 'display' room for the actual One Sixth Scale Dollhouse- my fashion dolls have been languishing on shelves and tubs, only being taken out to take a quick snap with a piece of furniture that I'm listing for sale, or just for my own fun. Since moving from the shop, the dollhouse has been stored in the barn. I know when I finally do get things arranged and the dollhouse moved in, it will need loads of touchup. In the midst of the sorting in the display room, I decided to make full use of the shelves, and display other furniture sets that usually are stored in containers. I originally purchased this Sindy kitchen set on Ebay last year for the dollhouse. I have decided to look for a Kenmore kitchen set or another Sindy kitchen set, for the dollhouse and have a vintage kitchen set up like one of my friend Riekie, whose album is on Flicker. I loved the way she did this display using the Sindy furniture, not impossible to find in the UK, hard to find on Ebay in the USA.
Here are the pics of what I have so far constructed for the shelf display, using foamcore and posterboard.


As you can see, the whole setup looks nice but the laptop cabinet will probably disappear, since it appears to be too modern and not as in scale as the Sindy furniture with the Rement! Holiday Thanksgiving Feast Barbie and Mini American Girl Emily look right in place with the miniatures I did for placement. I am thinking of taking the pieces which are simply taped together right now and making them into an actual roombox that fits into the shelf space, but the foamcore pieces adhered/glued together for a more permanent and stronger structure. I was really pleased at how well the scrapbook papers matched this color of the Sindy items.
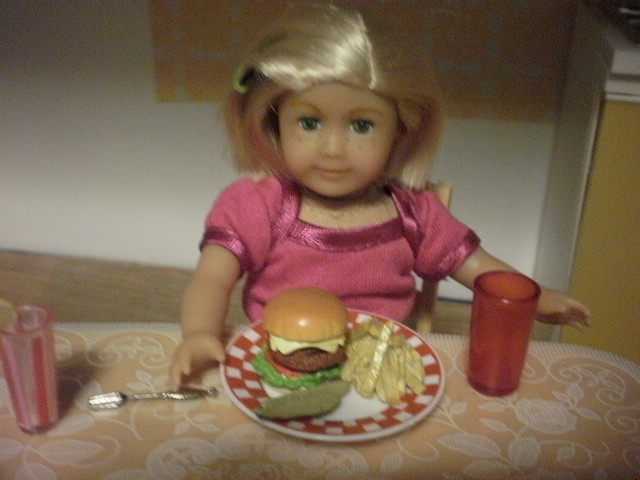
Mini Emily is ready for breakfast, lunch and dinner with Barbie standing nearby ready to provide turkey if that isn't enough to satisfy the Rement appetite.


More on this diorama later, and more photos can be found in my Flicker album.
~Lisa

Sunday, June 5, 2011

Doll size comparisons

It has been a rainy day here this Sunday morning, so I knew that I wouldn't get much done on the dollhouse restoration, which is moving along quickly. I have some exciting ideas for the attic rooms on the third floor, so must get materials together before moving forward on those rooms.
Since I was a little bored, I decided to take some comparison doll photos of the Mini American Girl Emily doll I received,with other small dolls. One of the most unusual things about these dolls is they are more in scale than the current Mattel Chelsea- who is far too thin and skinny for a little girl- she is so oddballish. Why oh why did they do away with Kelly....
anyhow, here are some of the photos! Enjoy!


On a lighter note, I was able to get pics of Mini Emily visiting Minuette's sweet shop. I think she loves Rement!


Hope everyone has a great Sunday, and God Bless!
~Lisa

Saturday, June 4, 2011

Door exterior finished..More dollhouse Restoration!

I got alot done this morning on the dollhouse. I finished wallpapering the 2nd floor bedrooms, and did some on the parlor as well- except for the stairway wall. Kitchen baseboards are stained and installed. But mainly, the thing that was stumping me a bit was the front door- it would have to be built up with stripwood, which I did as you can see here. I will probably get a curved pediment and glue it over the door, but for now, I am thinking it looks pretty good. I used golden oak miniwax  for that and the baseboards in the kitchen, and it turned out nice.


Here is the upper right hand bedroom finished with its paper, and the closet door framed in. I decided on this because it is such an oddball height- 8 inches and 1 7/8 inches wide!! My dad wasn't too exact on convenience for the dolls back in 1975...lol. So I used stripwood stained and framed in the doorway. The borrowers will probably move into that space....lol. Here you can also see the Kitchen finished as well with its baseboard trim. Sorry my pictures are so bright, but I work outside in the cool of the morning on two large tables in my yard, near the garage office, and it is convenient to move about in.


April Mae and Mini Emily loved the new renovations, and April Mae said '..it's about time! This is alot more space and I can't be cooped up with all those OTHER dolls!' She made herself right at home upstairs. I didn't have the heart to tell her that ALL of the tiny dolls would be living there...
I stopped work on the house attic rooms because though I had purchased wallpaper for them, I had an idea that I might do something a little different..........more updates later!
~Lisa

Friday, June 3, 2011

More Dollhouse Restoration continued...


Well, more dollhouse restoration is continued on my old dollhouse. Working on this house brings back tons of memories, good ones, when I played with it as a kid. I remember about this time loving that school was going to be out so I could play with it even more and create more items for the dolls, such as clothes, food out of polymer clay, and so on. This old house is special to me, and it feels good again to be making it beautiful again, after so much neglect.
I purchased the wallpapers for all the rooms and am pleased with the colors. I got one of the upper bedrooms papered today, and the kitchen as well as all of the floors done too. When the house is totally papered I can being to work on cornices and floorboards, and then the windows.


Also, today a surprise came in the mail- Mini American Girl Emily! She came in her box with her small book. The mini american girl dolls stand about 6 inches high, and are perfect for the dollhouse, since its scale is so wacky. I took a few pics to see how she would look in the dollhouse, and she will work out fine. The tinies haven't met her yet, but Big American Girl Kit has...
I am hoping to do some more work on the dollhouse tomorrow, which will make wonderful new memories for its history.....out with the old, in with the new!
~Lisa